My First Blog Tutorial!!!
Serpentine Necklace
Recently I made a necklace and posted it online. It was a stitch I had created years ago which was totally by accident.
It came about in the very early days of my beading. I had a friend who had some pearls and gemstones. She wanted them strung and at the time I didn't know how to string pearls. I also wanted a stitch that would show off the bead and bring out its beauty, especially if it was a gemstone. Basically I wanted to create something where you would notice the beauty of the beads first, and then the stitch.
So I started fooling around and this is what I came up with. Well that was over 20 some odd years ago, and lately I resurrected it to make a few pieces for my Etsy store. I have used this stitch off and on for many years and notice it comes out best with 6mm rounds. You can use gemstones, glass rounds, Presciosa, Swarovski, and Chinese crystals! I have used 6mm bicones as well, and it adds a different dimension to the stitch. The spine of the stitch is an 11/0 seed bead. I like miyuki and Presciosa seed beads....TOHO beads are lovely as well. Any 11/0 seed bead where there is a ton of uniformity works well for me. I have not tried it with delica's because I feel that they are cut too small.
I first start out with about 3 yards of thread, a little over. You can use fireline, power pro, or wildfire. I am especially fond of Wildfire. If you have ever used fireline you know the black one stains your fingers. Wildfire black does not.
I then condition it with Thread Heaven, and have found that this cuts down tremendously in the tangling of such a long thread.
Put on a stop bead and leave a tail of about 12 inches. Now the fun begins! String on 10 11/0's, a 6mm round, and 1 more 11/0.
Now take your needle and skip the first three seed beads you cast on and put your needle through beads 4-9. Skipping seed bead 10, your 6mm and the other 11/0. It will look like this,
Add on 7 11/0's, 1 6mm, and 1 more 11/0.
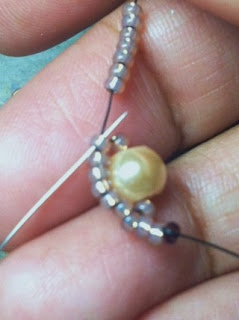
Now for the interesting part! Take your needle and go back through bead 9 from the first stitch. It should all look like this,
Now add on the next 6 beads to your needle and pull through.
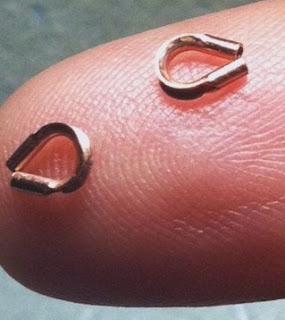
Now you just keep flipping and repeating until you reach the desired length. I usually like to end my piece with wire protectors. I go through them at least twice and then run my needle through the piece for about 6 inches and then cut the excess thread.
Here are a 2 pieces in my Etsy store that I have recently made
I hope you enjoyed my tutorial!


No comments:
Post a Comment